1.38.0 - Rapid Platform

30/03/2024
Features
Creating and enquiring about support requests
What is a support request?
A support request is a unit communication between the system user and the system's support staff. A user can create a support request when he/she is not able to proceed with a system functionality on his/her own or with the help of documentation. This indicates the need for assistance and a support request is a method to seek that assistance from support staff.
Users can also use support requests to submit bugs or improvement requests.
How to create a support request?
To create a support request consider the following points:
- In Explorer, click the chatbot icon.
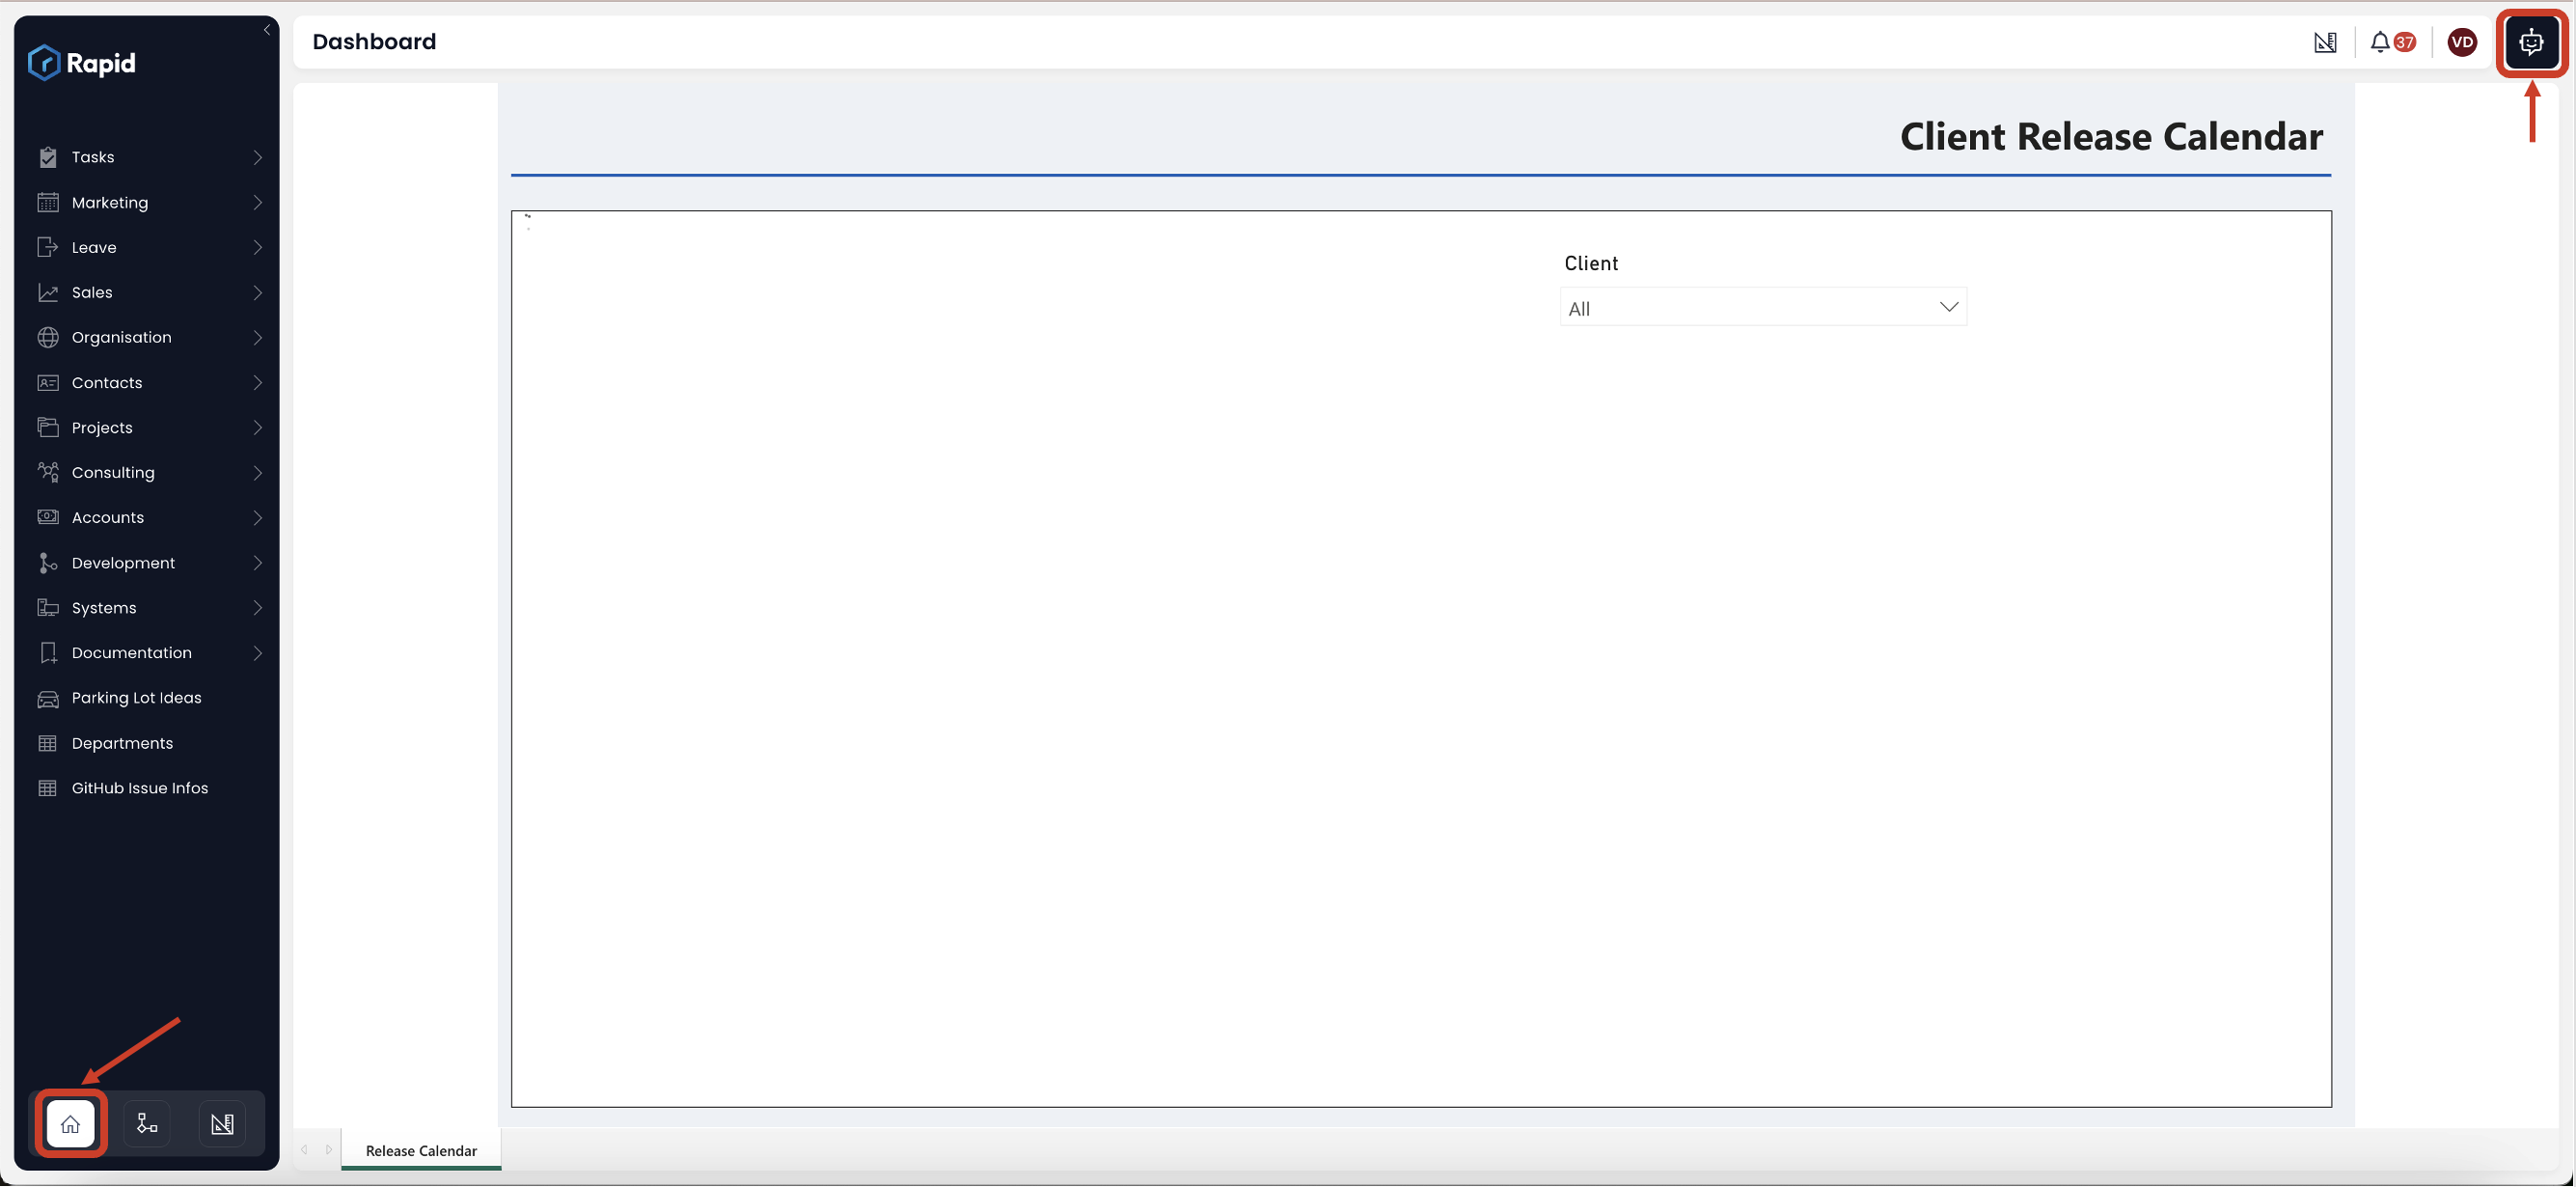
- The chatbot assistant panel will open. Click on Support.
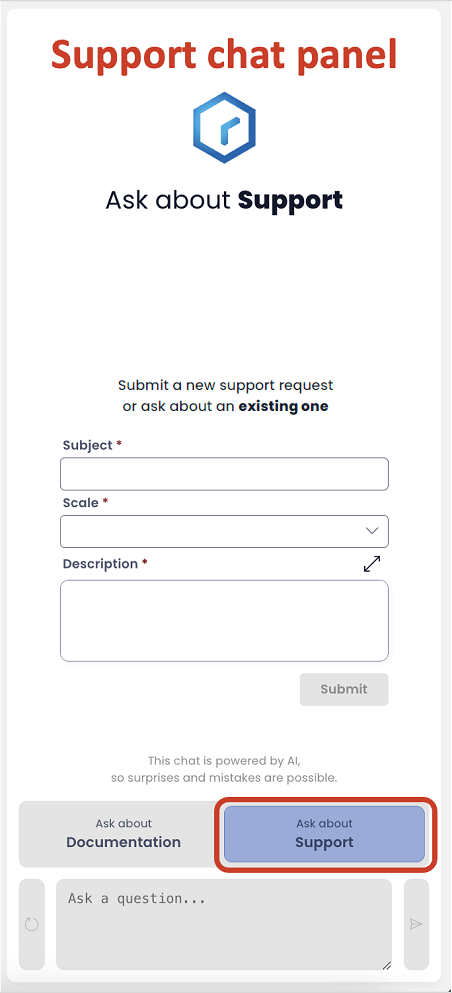
Rapid Platform uses two different Chat bots; one trained on each - documentation and support.
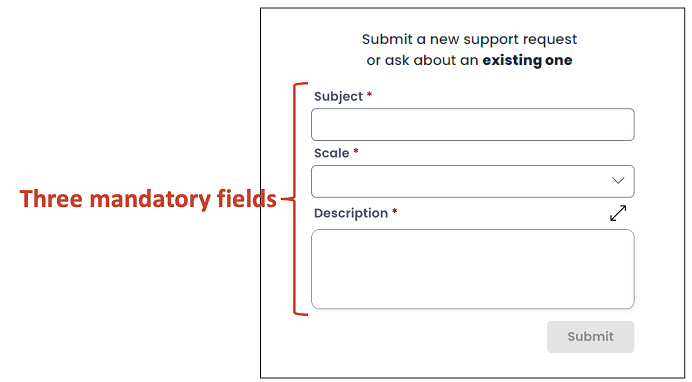
- You need to fill out the three mandatory fields:
-
Subject - This a text field. Type in the subject of your support request here. It is a best practice to keep the subject crisp and relevant so that the support team can understand and refer to the issue effectively.
-
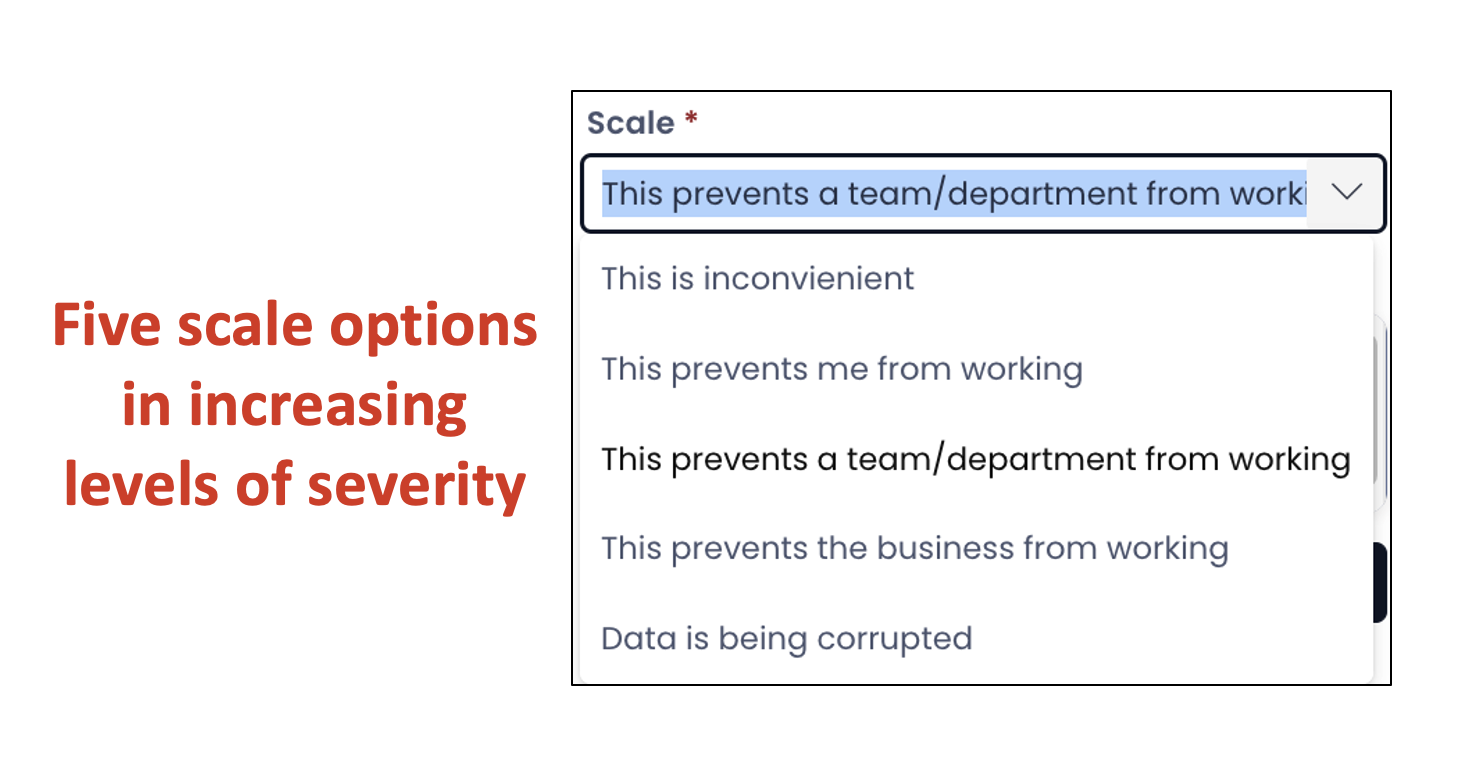
Scale - This is a dropdown field. Scale indicates the severity of the issue for the user. There are five levels of scale (in increasing order of severity). Select the most relevant scale value for your support request.
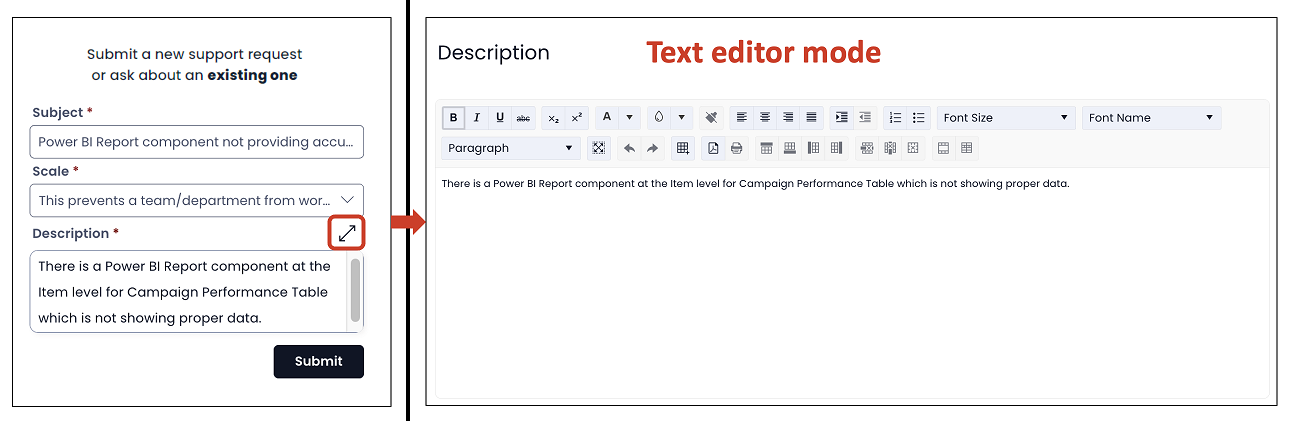
- Description - This is a free-text (multi-lines of text) field. You can use this field to describe the issue with as much details as possible.
Description is a richtext field. Therefore, you can use formatting options and also add images etc. as we do in a text editor.
To enter text editor mode, just click on the arrow icon at the top right corner of the Description field.
- Click "Submit".
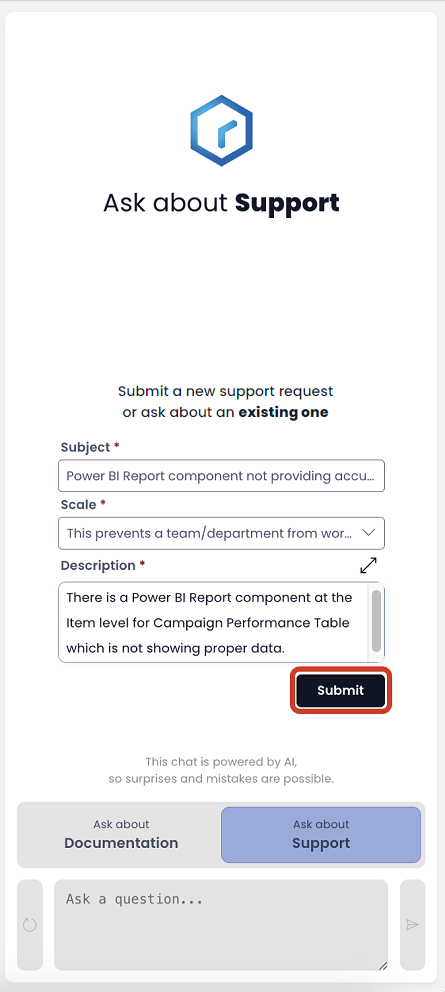
The Submit button shall become active only when all the three the fields are populated. Otherwise it remains in the inactive state.
Once the support request is submitted successfully:
a. A success message will be displayed in the Support Chatbot panel.
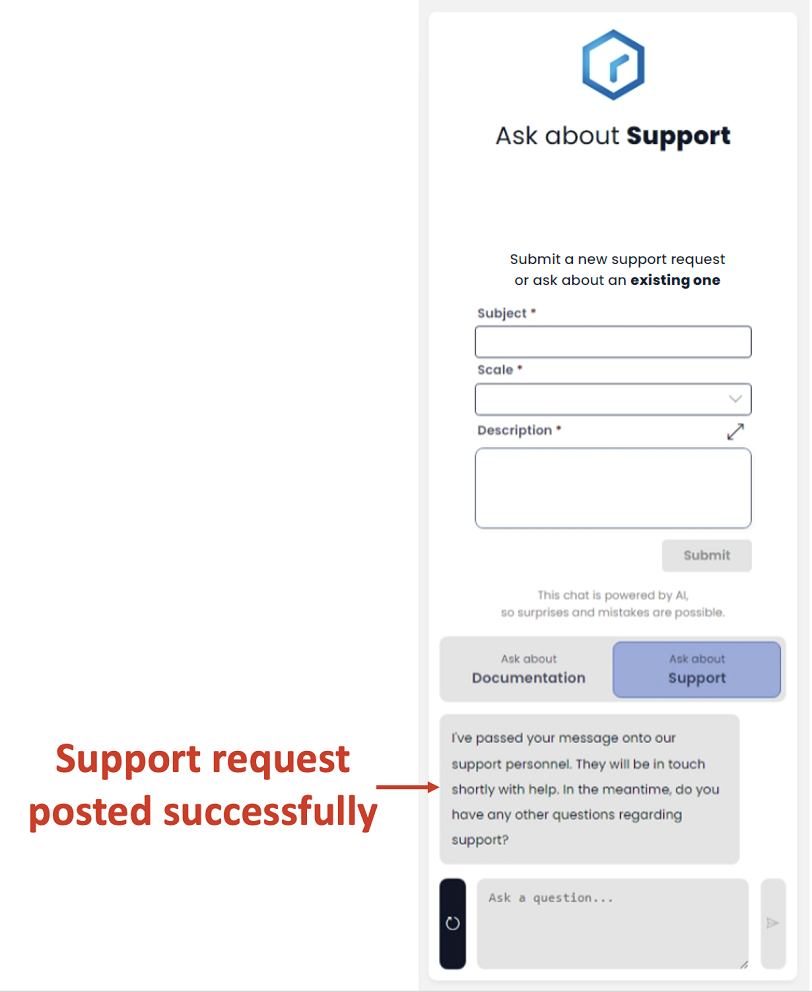
b. An email confirmation will be sent to your inbox.
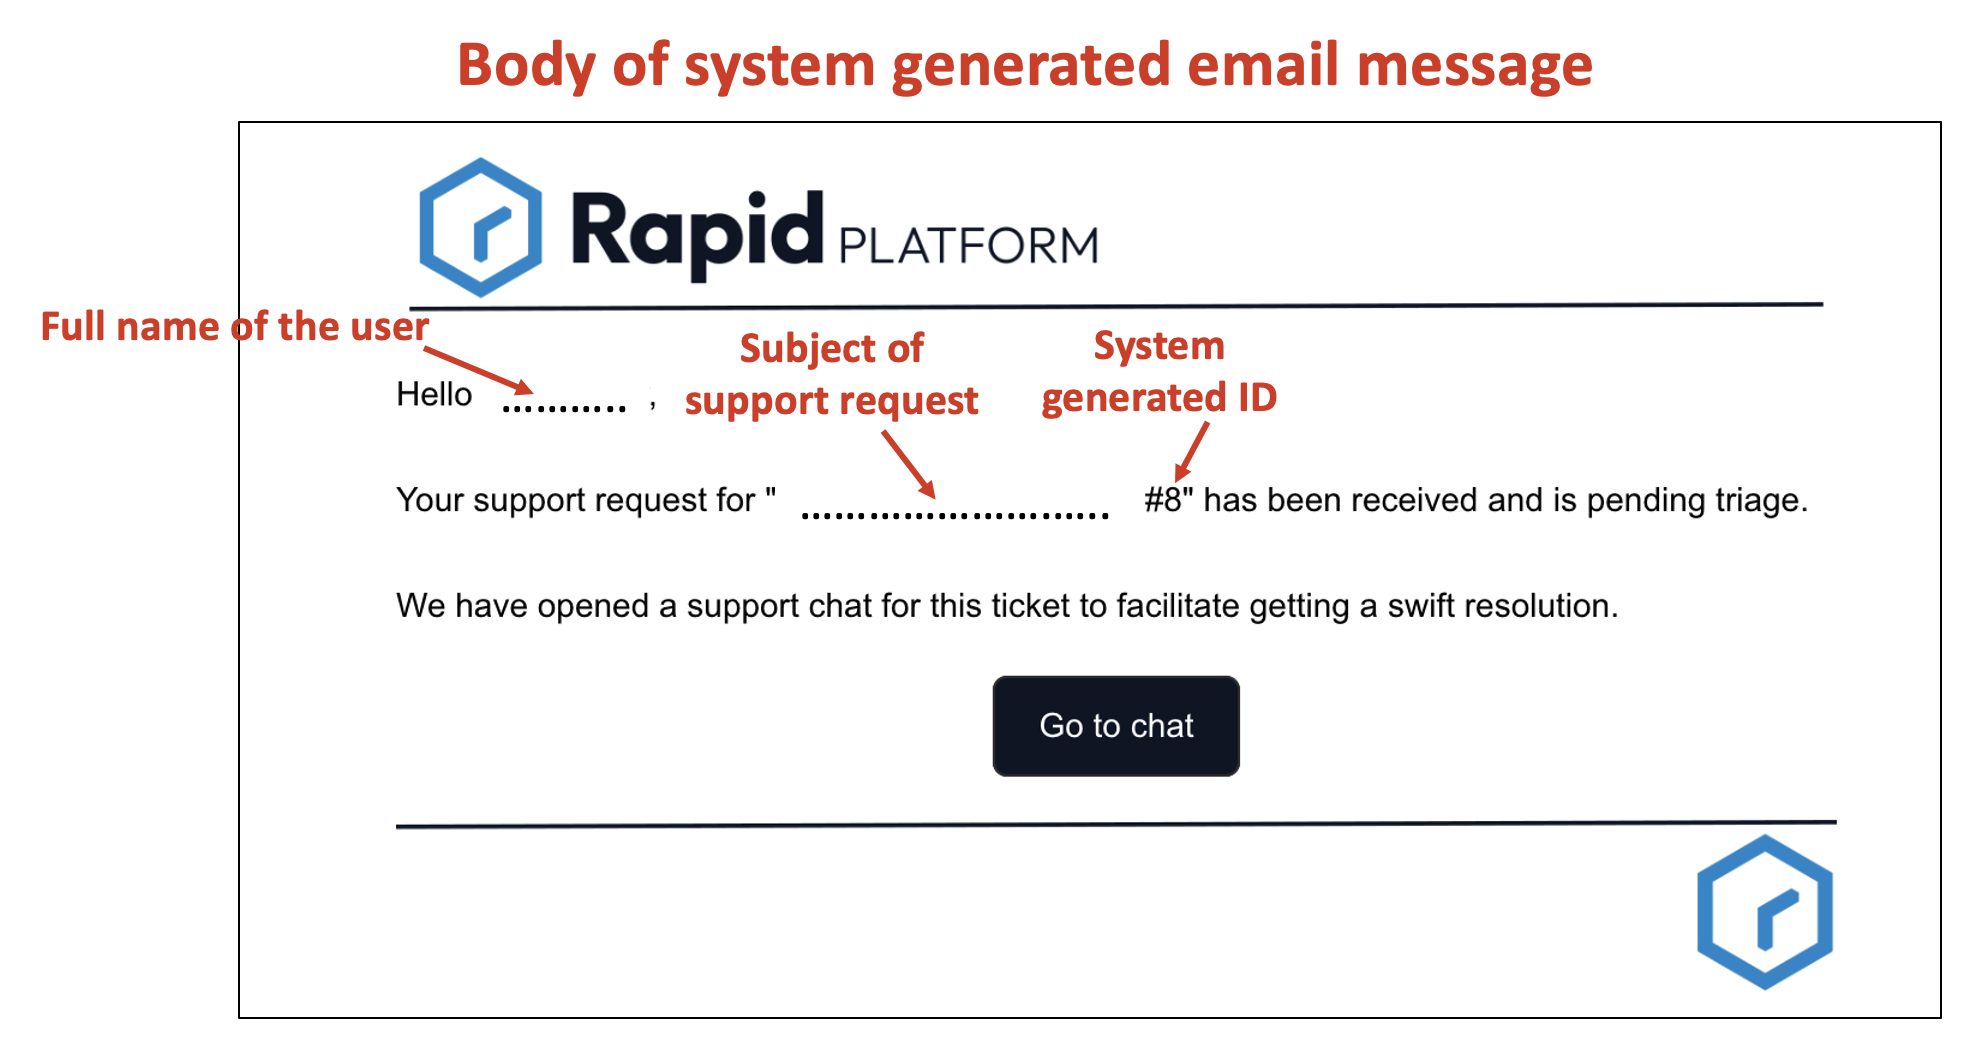
The email will display the subject of your support request, appended with a system generated number. The email will also have a "Go to chat" button. If you click on "Go to chat" button, it will open the Microsoft Teams chatroom, which will connect you to the support team. The support team can ask you more relevant questions here, and you can use the chatroom to provide more details about the issue.
How to enquire about a support request
Users can enquire about their support requests (submitted in past), from the chatbot.
The chatbot will respond with the status of the request.
To enquire about a support request, please consider the following points:
- In Explorer, click the chatbot icon.
- The chatbot assistant panel will open. Click on Support.
- In the "Ask a question" field, type in your query regarding the support request.
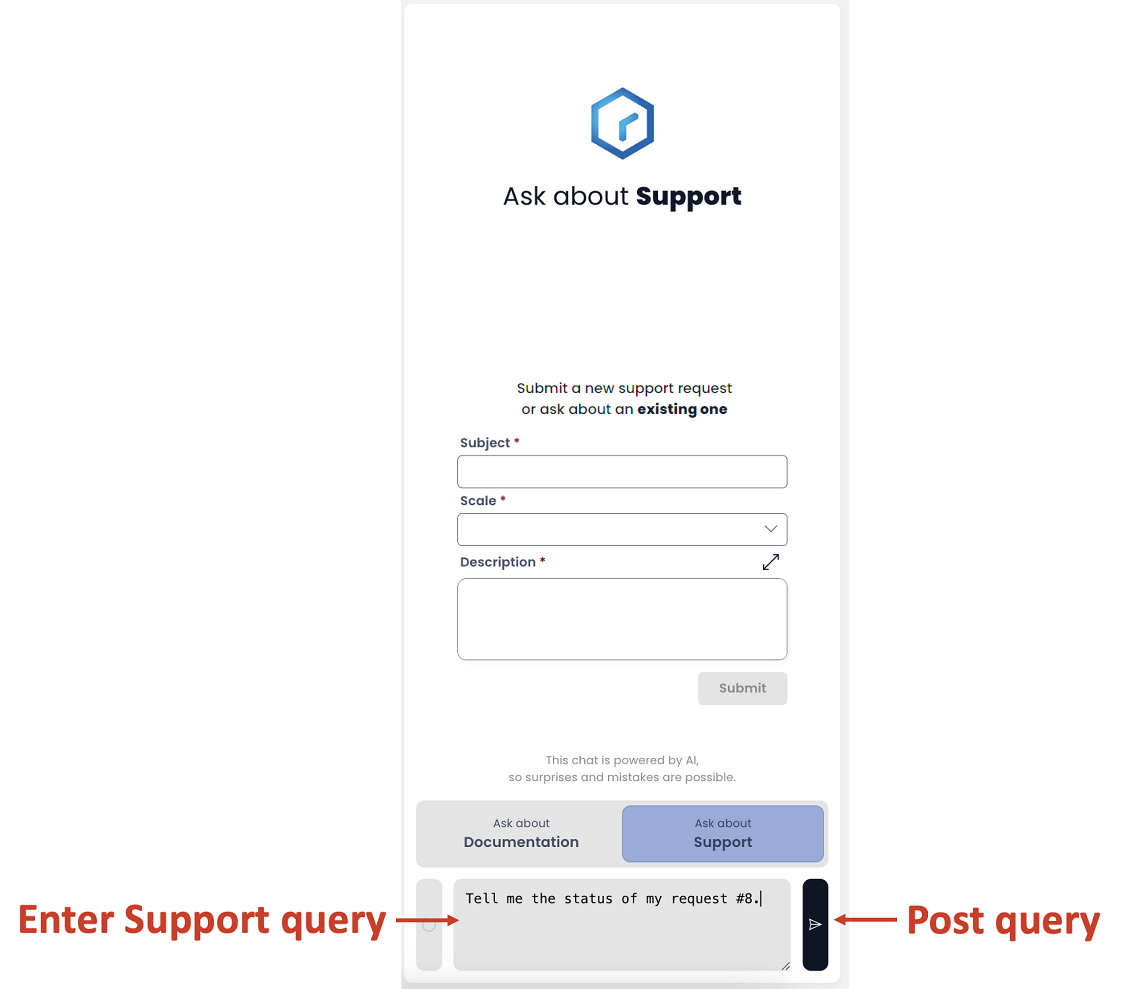
- Click submit.
The chatbot will respond with appropriate answer.
Improvements
/characters in DocX file names will no longer be set to_- Huge improvement in save & load times for pages, especially on large sites
- Improved support in Workflow OData filters for tables/columns that begin with a numeral
- Improved Adaptive Radio controls justified styling
- Added support for validation on repeating sections in Adaptive v3
- Huge improvement to the validation configurator for Adaptive v3
- Added required visual toggle for input fields in Adaptive v3
- Added Date column support in Adaptive v3
- Added delete confirmation when deleting a column
- Ensured the Get Item service task that fails to get an item throws an error
- Disabled needing a principal configuration when setting up Board components in Designer
Bug Fixes
- Fixed signing up with certain Azure permissions throwing an error
- Adding a Principal to a Role will no longer error out
- Fixed manual upload being erroneously applied to the file browser in some scenarios
- Prevented data association update actions from being able to alter system managed fields
- Disabled double submit on public forms when mashing the button